- Industrial Design Service from Start to Finish
- info@creatid.com

Sprinter Van Cabinets for the DIY Squad
March 21, 2018
HotZot All-natural, portable weed killer
October 15, 2018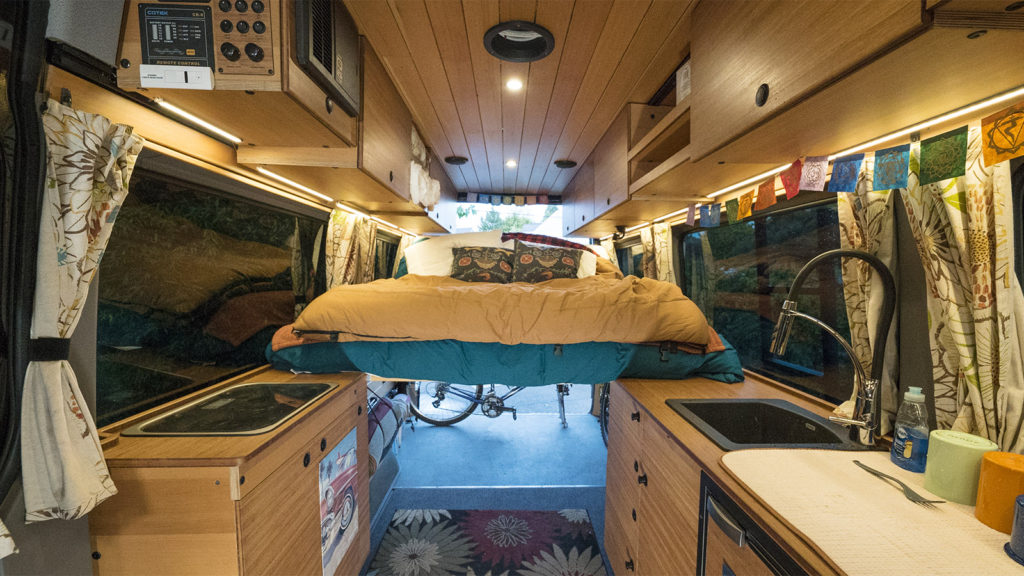
Van Life Upgrade with a Custom Kitchen
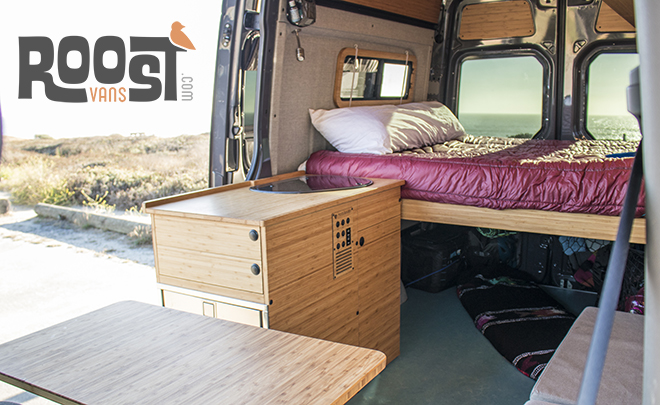
UPDATE: We install custom designed kitchen cabinetry like this for RoostVans.com in their custom van conversions.
Nothing makes a Sprinter Van Conversion feel homey more than a kitchen does. The bed lets us venture out in comfort, and it’s a key feature for any van dweller to take seriously. But the kitchen really increases the quality of life index when you’re hunkered down in a van for days, weeks, or months on end.
Need a custom kitchen for your conversion project?
CreatID builds custom Sprinter van kitchens—flat packable cabinetry and counter tops for the do-it-yourselfer—that ship right to your doorstep. Give us your dimensions and we’ll send you a proof and rendering, then ship you a kit that’s ready to install. Counters and cabinets aren’t easy, especially drawers. Let us help. Order your customized flat pack ready to assemble screw-and-glue kit today.
 Designing and Building a Custom Van Kitchen is Not Trivial
After we finished the upper cabinets for “Bonny” (our Sprinter van), and with our 5 week vacation looming just 4 weeks away, it was time to figure out the lower cabinets. Quick. Ironically this part was easier, but not trivial. Our floor plan was already established from the 2-seater second-row seating we had, plus the bed.
We researched all the components we needed in our galley kitchen, took size constraints into consideration and started designing. And just like the upper cabinets, these would also be flat, packable, and available to order…with a twist. Since the lower cabinets don’t have the same modularity, we are offering them customizable.
At this point in our build, we had three weeks left to get our cabinets finished and installed before a big trip we had scheduled.
Functional Requirements
- Refrigerator – Efficient and able to run on 12v power
- Stove – Propane, we love cooking with gas
- Sink – A real sink deep enough for food prep and washing dishes
- Faucet – Removable spray head to fill up backpack bladders for biking and hiking
Design Requirements
- Be free of windows, so we can enjoy a 360-degree view
- Minimal depth of all components (fridge, etc.) to maximize floor space
- Safely contain and cover electronics, to protect our toddler
- House the water supply and waste until mounting it underneath and outside
- Be flat, packable, and ready to assemble

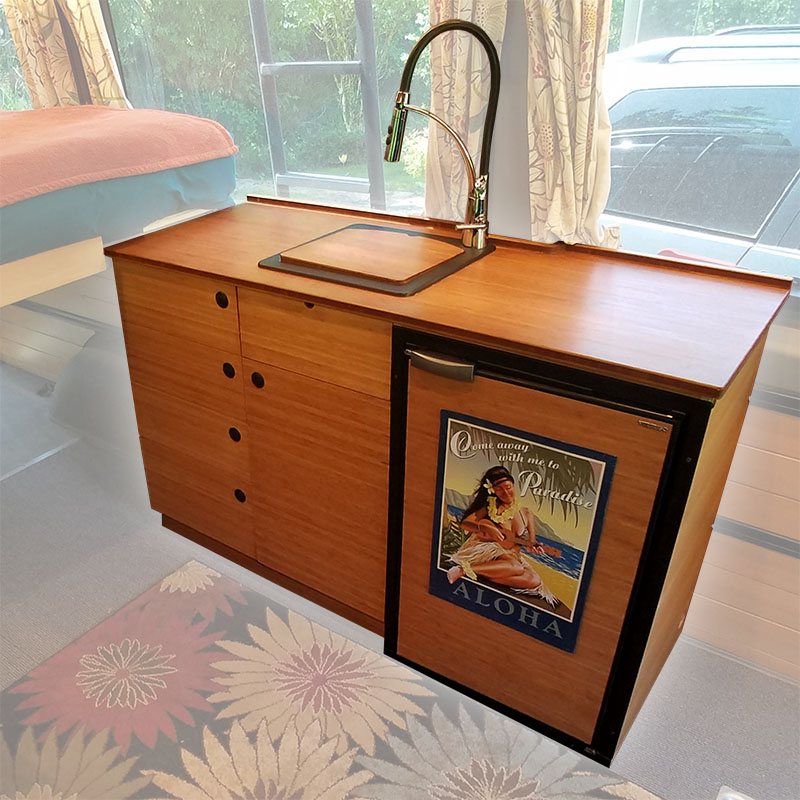
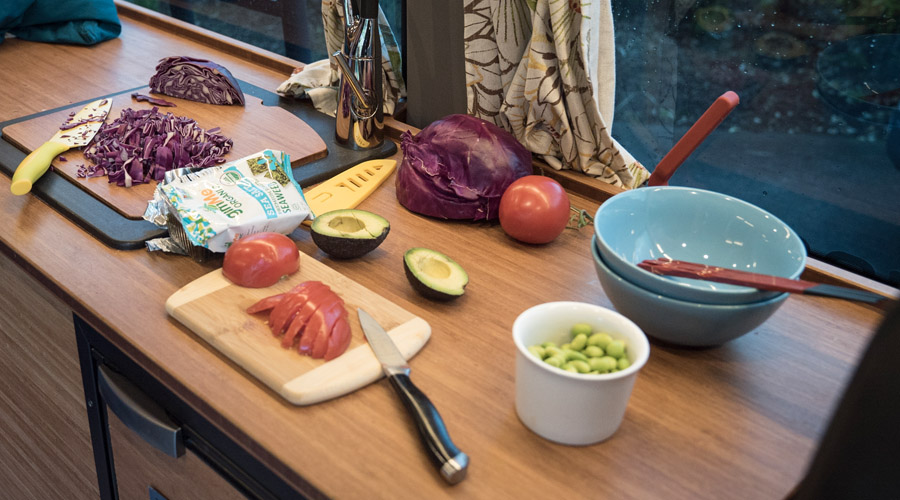
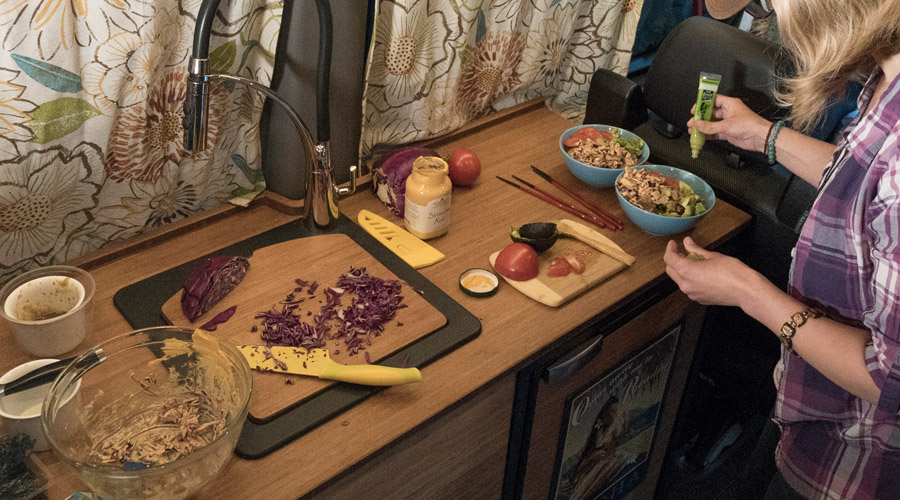
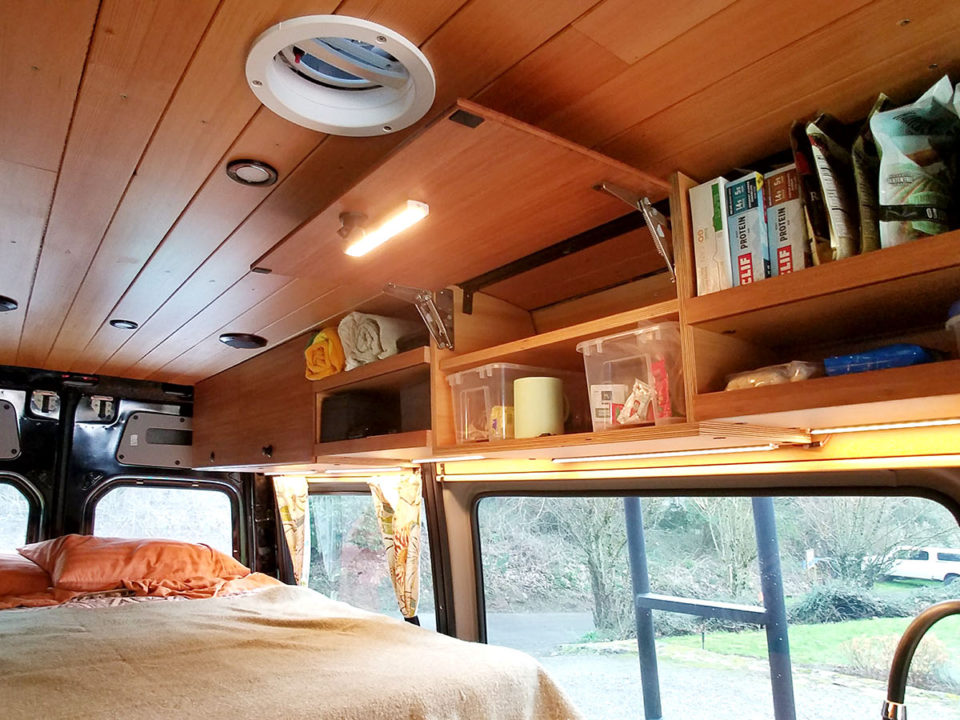
Plenty of counter space makes a van kitchen a joy
Our Sprinter Conversion Kitchen Design Process
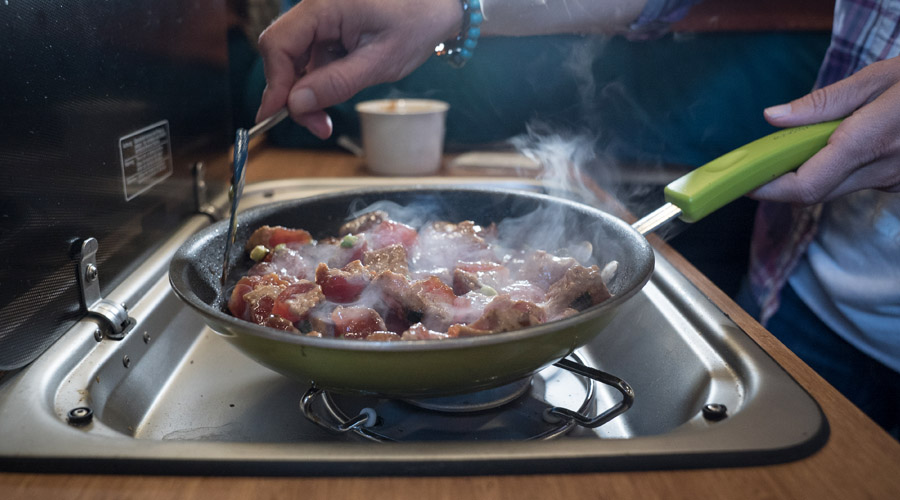
There are many RV-specific sink and stove products with stow-able tops that double as a countertop surface. Some were attractive, some weren’t. We decided to use an RV-specific SMEV propane stove with a built-in glass cover.
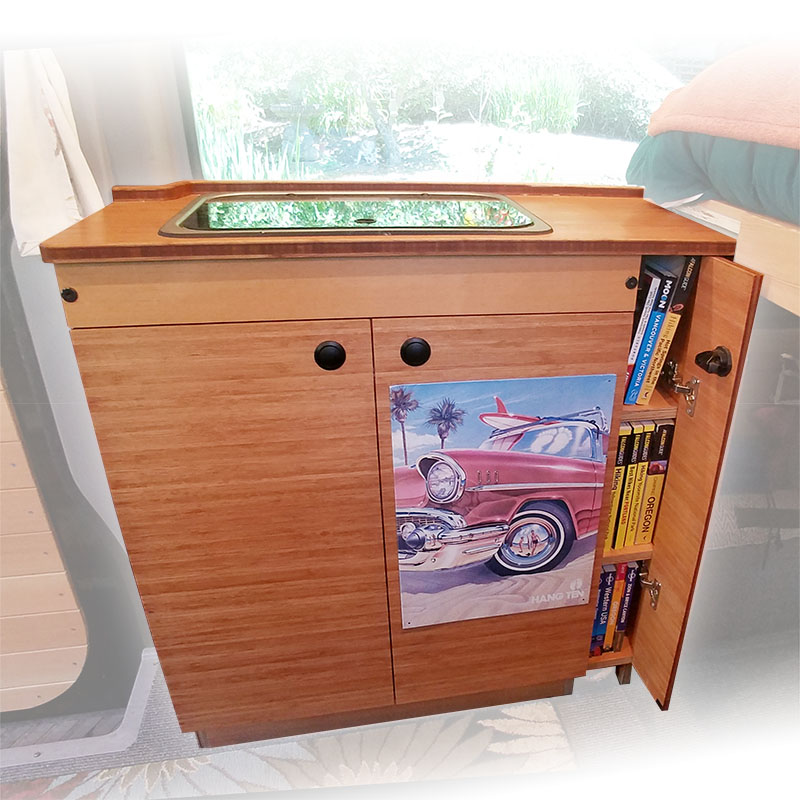
For the sink, we opted for a typical home-grade bar sink. We wanted less size but more depth than a typical residential sink offered. We also planned to fashion a removable cutting board to cover it up, helping us achieve a more cozy kitchen feel that didn’t scream: “Hey, I’m chillin’ in an RV!”
The refrigerator was probably the biggest piece of the puzzle.
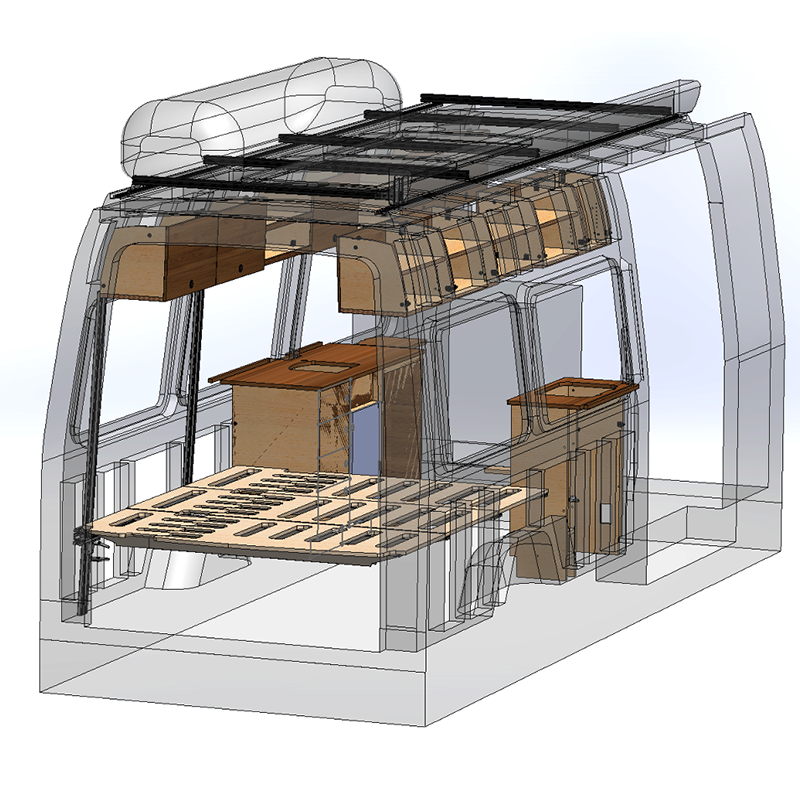
After laying out the Bonny Lass floor plan in SolidWorks 3D CAD, the floor space in the kitchen disappeared quickly. We wanted 40” of width so that my wife, toddler, and myself could be in the area (the additional toddler roaming space is equivalent to three adults). We weren’t successful in getting that much space to appease our toddler, but we netted the 40” of width with a carefully chosen fridge.
The limited options available for refrigerators was our Achilles heel. Most require about 20” or more of depth. If you’re planning on getting a 3-in-1 fridge that uses propane, it’s even deeper. We were lucky though when we scored a Vitrifrigo 17” deep 3.2 cubic foot fridge from Panther RV Products. This allowed us to build an 18” deep cabinet with a 21” deep countertop. Score!
 How can our counter be so much deeper than our fridge and cabinet?
This is why CAD is awesome. It gives you all sorts of ability to visualize in 3D. Both cabinet tops wrap into the window wells, giving us nearly 3 additional inches of countertop depth to work with.
Stove placement
We designed the stove to be on the right side of the van, along with the electronics. This is opposite the side of the sink and water storage. Not an accident. There is A LOT invested in that electronics cabinet, so I’m keeping water far away from it. The SMEV stove we installed is about 14” deep and the cabinet is 13” deep. This nests the stove nicely into the window wells, which again, gave us more room for floor space. Score 2!
All in all, we have two very shallow cabinets that give us plenty of countertop room, and 40” of foot room width for two adults at the same time. We gave up on having enough room for the toddler too—I’m not going to recreate the infinite interior of ‘The TARDIS’ from Doctor Who.
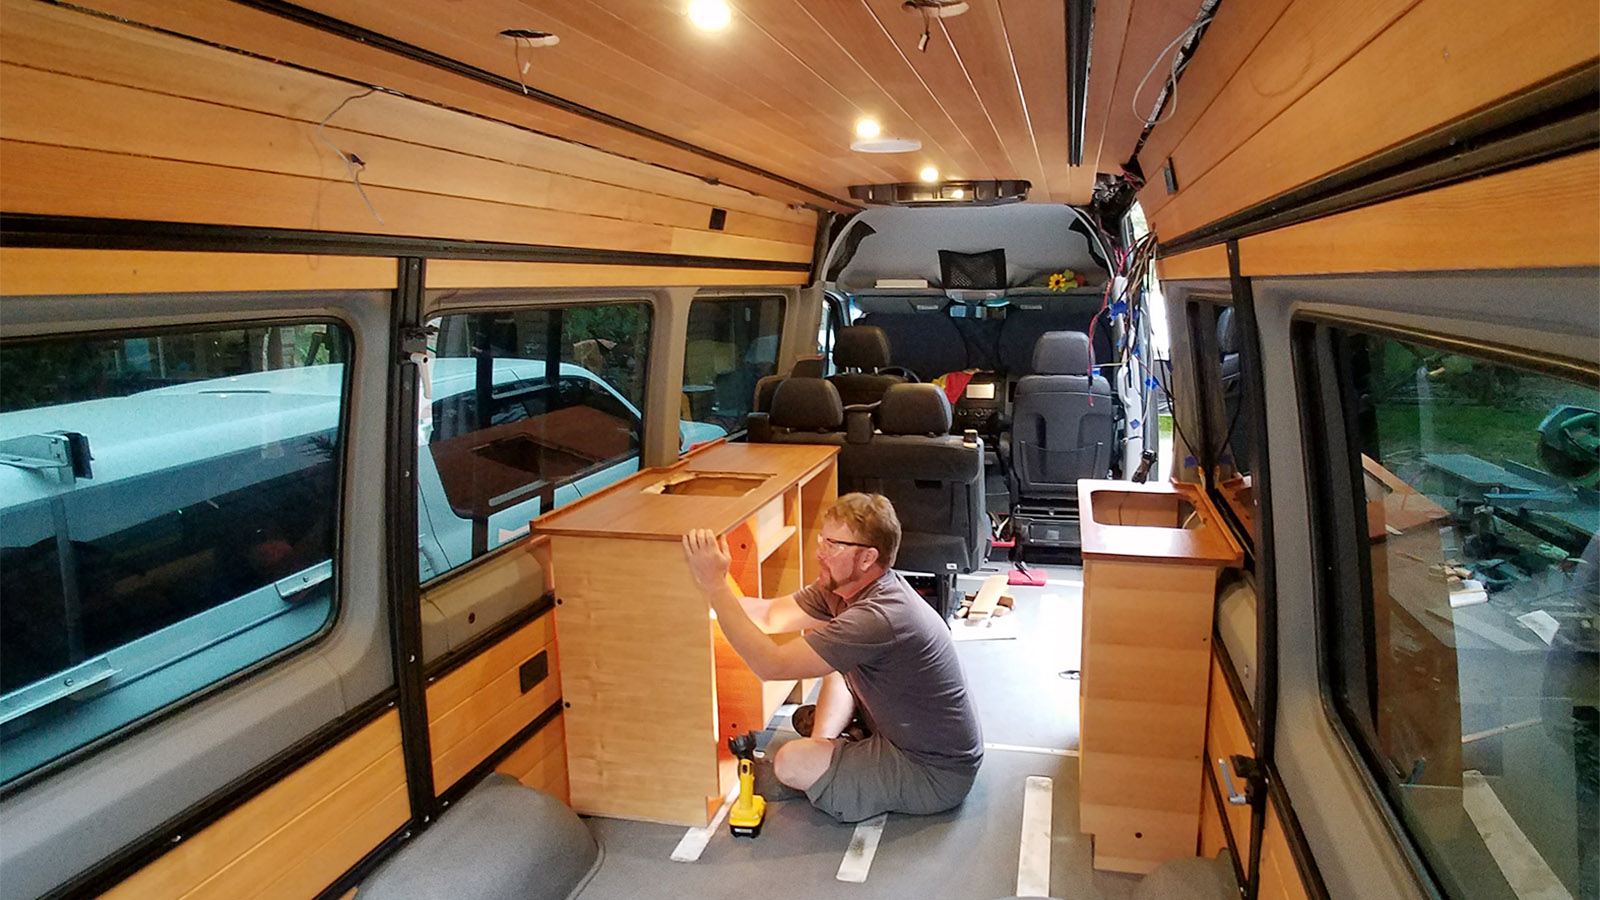
Quickly removing the upper cabinetry made it even easier to install the lower cabinetry into the T-Slot system
Two weeks to go…
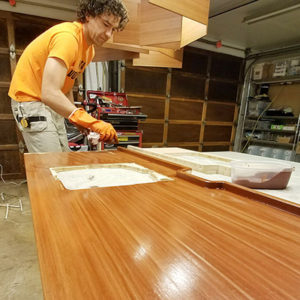
Finishing the Bamboo tops
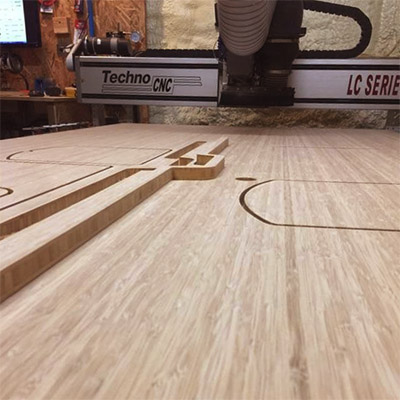
After the design was finalized and roughed out in CAD, we thought ahead and engineered the joinery so that it could be easily assembled in a living room. The goal is that A DIY-er receive a kit, assemble the cabinets with glue, a drill, and screws, then install it in their conversion van. For our build, we laid everything out on a sheet of Fir Veneered Apple Plywood in CAD, sent it off to the CNC, and voila…four days later we had a kit of parts.
One week to go…
Shortly after that, we completed assembly, finish, and installation.
I kind of wish there was some sort of drama to share with you, but there isn’t. Everything fit great. The Mounting System just plain rocks! I can’t tell you how nice it is to have such a robust structure to mount this cabinetry.
We did have one little hiccup. We didn’t have enough time to get the drawers designed in time for a hand-off to the CNC guy. We were able to build them in the shop when we got back from our trip. It only took four weeks to complete. In the evenings. After work… I so wish we had them done on the CNC.

Standard 5g Carboys fit perfect
Three days to go…
We purchased a Shure water pump and have been quite happy with it. We thought about getting a more costly variable pump but decided to risk the noise of a diaphragm pump. I’m glad we did.
The Shure diaghram water pump isn’t that loud. When we run out of water, we hear the pump running which signals us to turn it off. We installed the water pump in the cabinet, along with the two 5-gallon containers for white and gray water.
The nice thing about the water containers is that they have a 3/8” NPT threaded fitting that gives you the ability to securely tap into the top. You can use PVC fittings and flare fittings to make a pretty robust system that won’t leak. Furthermore, they’re, cheap, replaceable, and easy to fill and clean.
Sprinter Van Kitchen Spec’s, Features, and Discoveries:
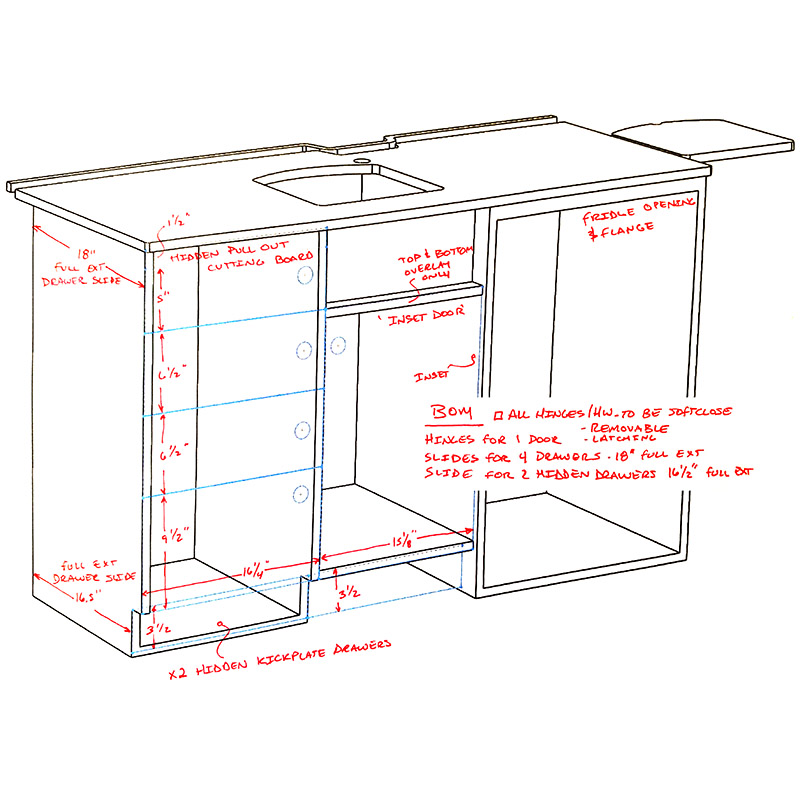
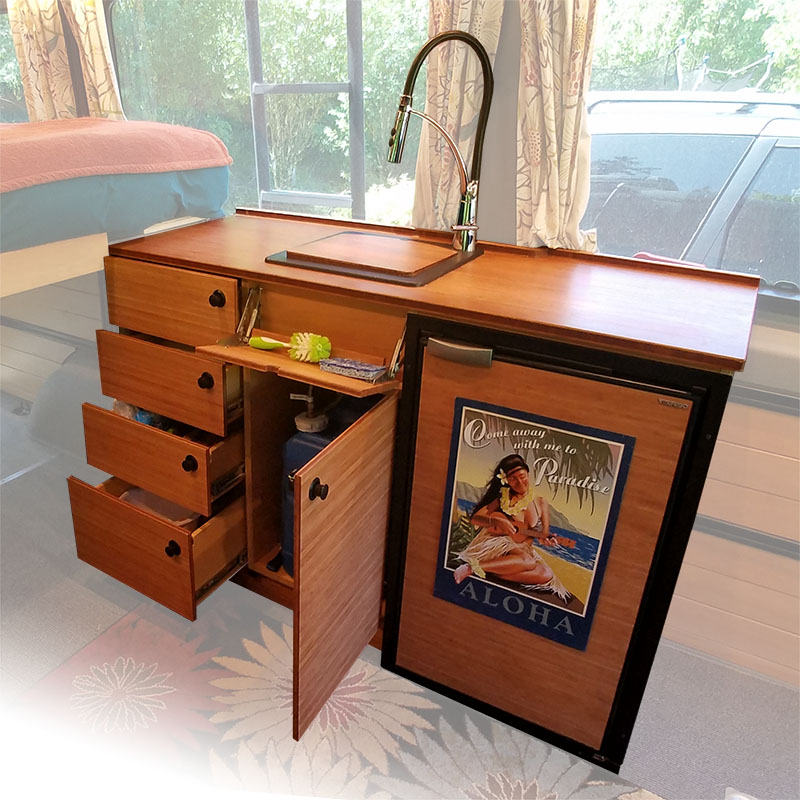
Left Side Cabinet Features
- 4 full extension, locking drawers (we installed these after our trip)
- 5 gallons of white water storage
- 5 gallons of gray water storage
- The 3.2 cubic foot refrigerator
- Water pump and water filtration installed right under the sink
- A super slick secret kickplate drawer (whoops…not a secret anymore, since it’s in my blog)
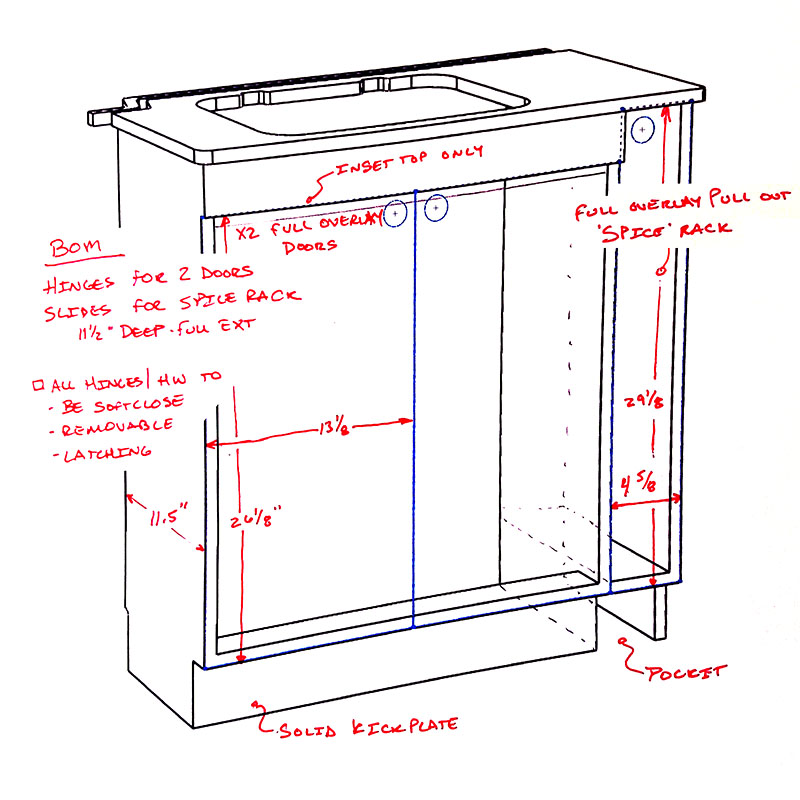
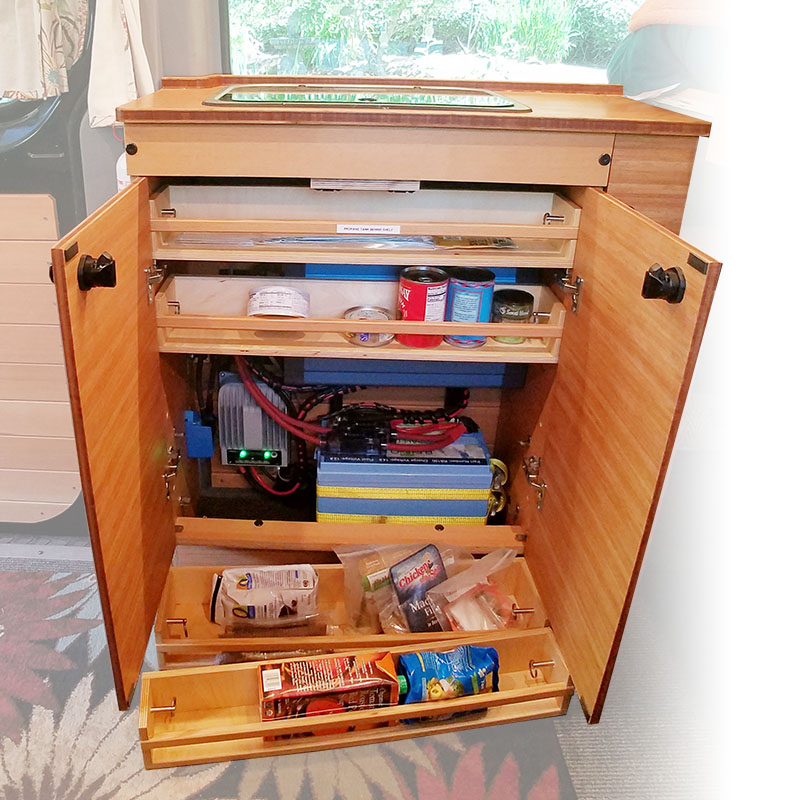
Right Side Cabinet Features
- A glass top covered propane cooking stove
- 1lb propane canister storage (plenty of propane for almost a week of cooking every meal, and lots of coffee)
- Plenty of room for the battery array, power inverter, solar controller, and a side cubby
- Space in front of the battery array for spices and cooking needs
The cabinet body is constructed of Apple Ply panels. These are slotted and predrilled to receive the horizontal components. Put down a bead of glue in the slot, assemble, pilot drill, and screw. Done.
The drawers are precut and easily assembled in the same manner. All panels and drawer bodies are pre-drilled for simple installation of the full extension drawer guides that we provide.
The cabinets are completely autonomous. You can remove six bolts, and the entirety of the sink and stove cabinets come out with all of their components (minus fridge, it’s just too heavy).
The pump, fridge, propane, drawers, etc., are installed directly into the cabinetry and self-contained.
All said and done, you can remove the entire Sprinter van interior—the upper and lower cabinets, bed system, and the double seat—in one and a half hours…empty.
All can be reinstalled in 3 hours…ish.
The P-Trap drain we used was a low clearance style and I’m okay with it. It stinks unless you close the drain, but gives the clearance we need underneath for the carboys.
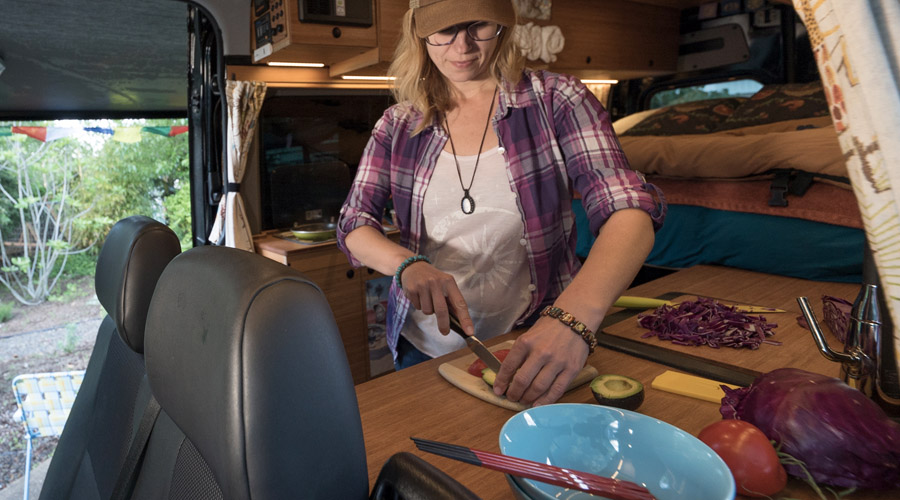

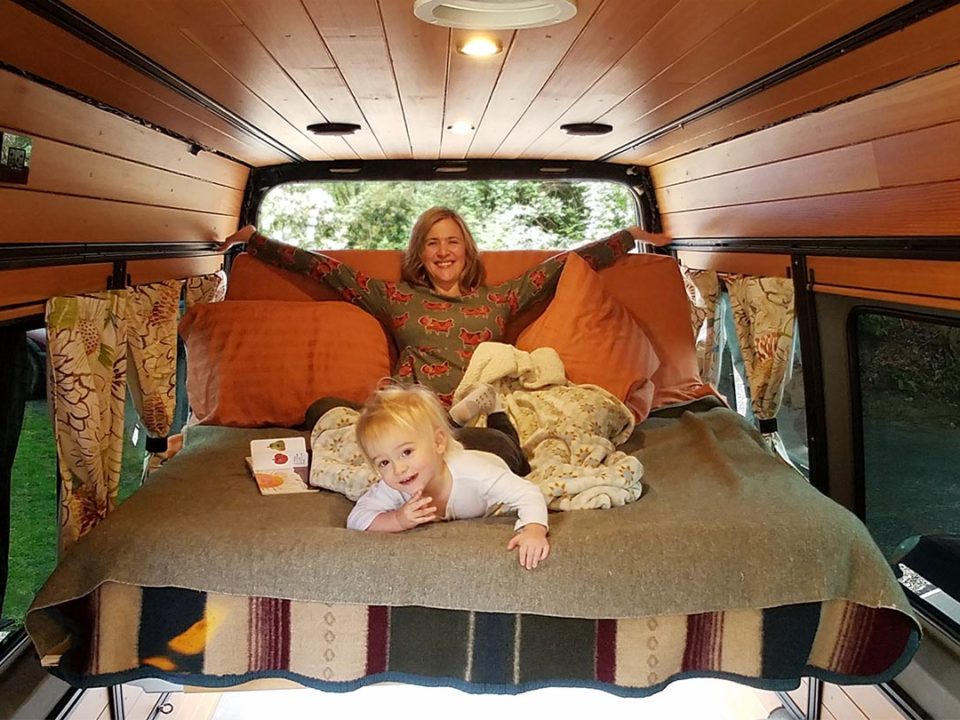
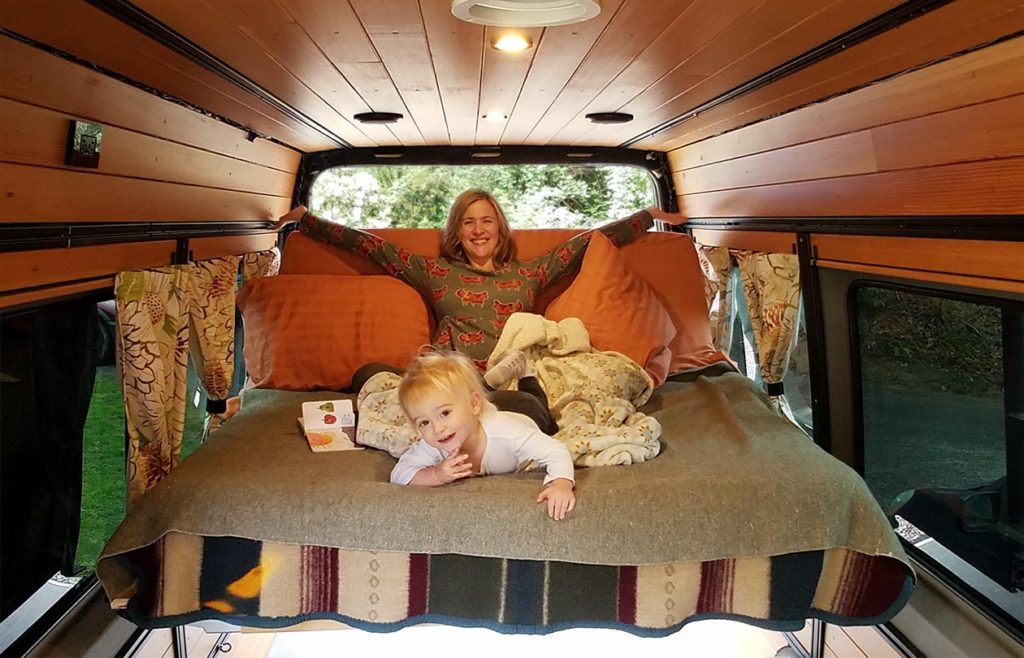
And a big thank you to John Waller at uncagethesoul.com for some excellent photography – he really captured the quality of our sprinter van’s ‘uncaged soul!’
Custom Sprinter Van Kitchen Cabinetry Orders
Everyone’s cabinet needs are unique. We are fulfilling limited, custom kitchen cabinetry orders. Please contact us directly through RoostVans with your project needs. If you are interested in a full custom van conversion, head over to RoostVans as well for more details.
Stay tuned…
Some of the above links will take you to Amazon, and as an Amazon Associate CreatID, Inc. will earn revenue from qualifying purchases.